079 — Guide for managing the access to your call queues
Administrator’s guide to managing the access to the call queues of your phone system from Studio, Ubity’s online management portal.
1 Log into the Ubity web interface
Interface Address: studio.ubity.com
Username: your e-mail address
To obtain a password, you must request one on the interface (click on Recover your password) because Ubity does not have access to them for security reasons.
2 Goal
Go to the Tools tab and click on Queues.
The management of the access allows the users to have access only to what they need. For example, the Director of Sales does not need to have access to the support queue.
3 Groups needed
To manage this option you need the following groups:
- Manage specific queue (with recordings)
- Manage Queue Supervisor
Only the Admin of a company may give you access to this group via Studio or the Admin can send a request to our customer service.
4 Assign the group to specific users
In order for the users to manage specific queues you need first to give them the group Manage specific queue (with recordings).
Note: Do not forget to adjust the group of the other users.
If you need more information to change the group of a user, refer to the Guide for managing your account users.
5 Manage access to the queues
Go to the Tools tab and click on Queues, the list of your queues appears.
![]() You must click on the Edit button at the end of the line corresponding to the queue you want to make changes to then choose the tab Access.
You must click on the Edit button at the end of the line corresponding to the queue you want to make changes to then choose the tab Access.
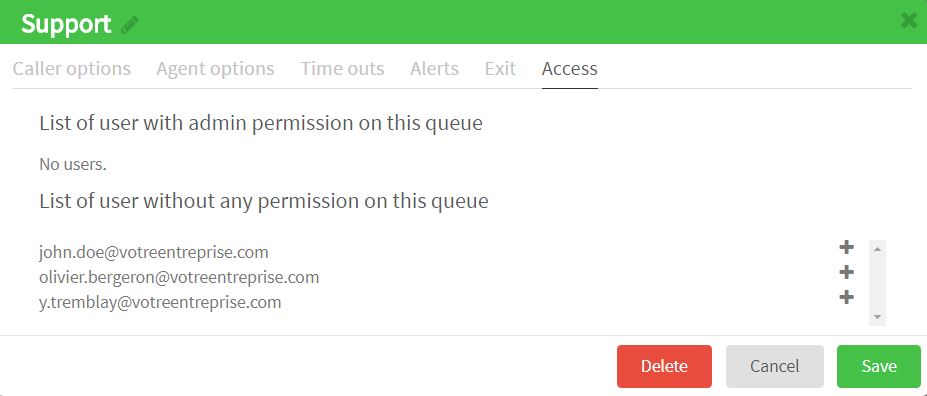
The first list includes the List of user with admin permission on this queue and the second one includes the List of user without any permission on this queue.
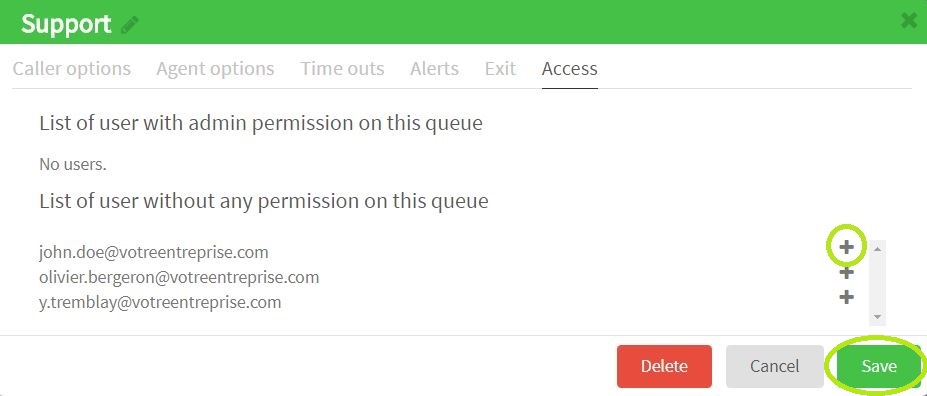
![]() If you want to give access to a user simply click on the plus at the end of the line corresponding of the desired user.
If you want to give access to a user simply click on the plus at the end of the line corresponding of the desired user.
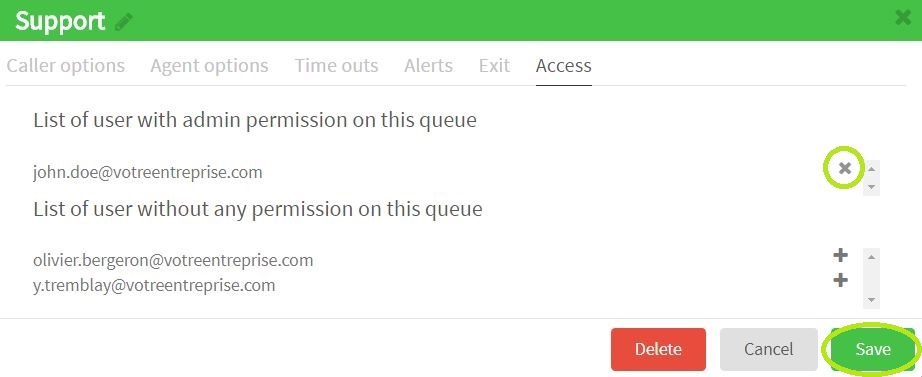
![]() If you want to withdraw access to a user simply click on the cross at the end of the line corresponding of the desired user.
If you want to withdraw access to a user simply click on the cross at the end of the line corresponding of the desired user.
To find out more about call queues, also visit:


