
1 Instant messaging
Sending an IM
1 You can send an IM to a contact who is in your company and is using Ubity UC Desktop or
Mobile.
From the Contacts tab |
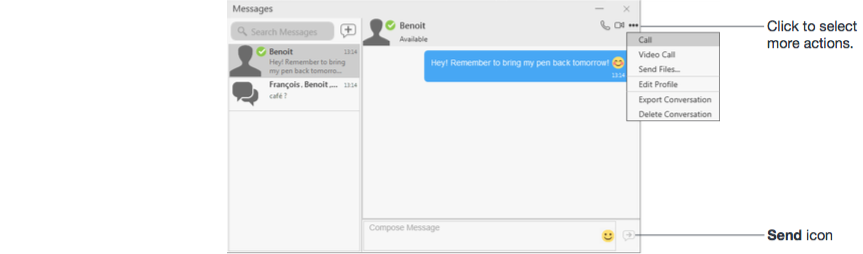
Right-click on the contact and choose Send Instant Message. The contact must have a softphone address. Or click on the IM icon that appears to the right of the contact name. |
An active phone call |
If the person is a contact, choose Send Instant Message from the call panel menu. |
An active conference call |
If the participant is a contact, choose Send Instant Message from the participant menu. |
From the Messages window |
Click the New Conversation icon beside the Search field, and type a number or name. |
2 Type the message. Include emoticons and formatting (Control+B, Control+I, Control+U), as desired.
To insert a return in the message, press Shift+Enter. You can control the behavior of Enter and Shift+Enter on the Softphone > Preferences > Application panel.

3 Click the Send icon.
Receiving an IM
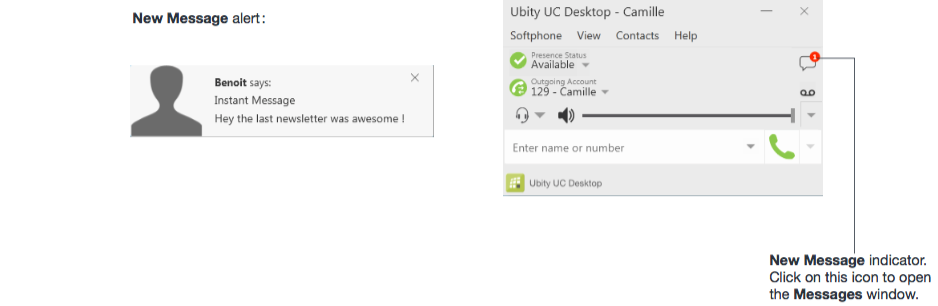
When an IM is received, either the Messages window or a Call Alert pops up. (To control which window appears, choose Softphone > Preferences > Alerts & Sounds.)
2 Group chat (conference IM)
Group chat allows you to exchange instant messages with a group of people in the same session.
There is no limit to the number of participants in a group chat session.
Starting a Group Chat
1 Open the Messages window
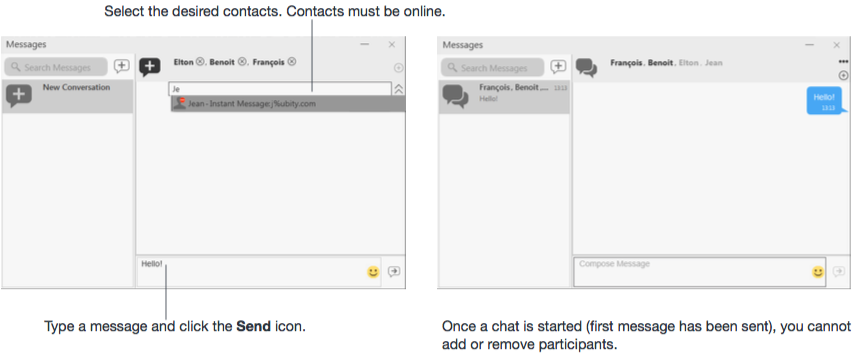
2 Add the recipients you want to include in the group chat
3 Type a message and click the Send icon. Once a chat is started (first message has been sent), you cannot add or remove participants.
Managing a Group Chat
Leaving a Group Chat
Log out lets you leave all the active group chat sessions. The session continues with the remaining participants. Once you leave a group chat, you will not be able to rejoin the session. The thread in the Messages window becomes inactive (grayed out); you can read chat history, but cannot participate or download unread messages.
Deleting a group chat session on the Messages window also lets you leave the session, but you will lose chat history.
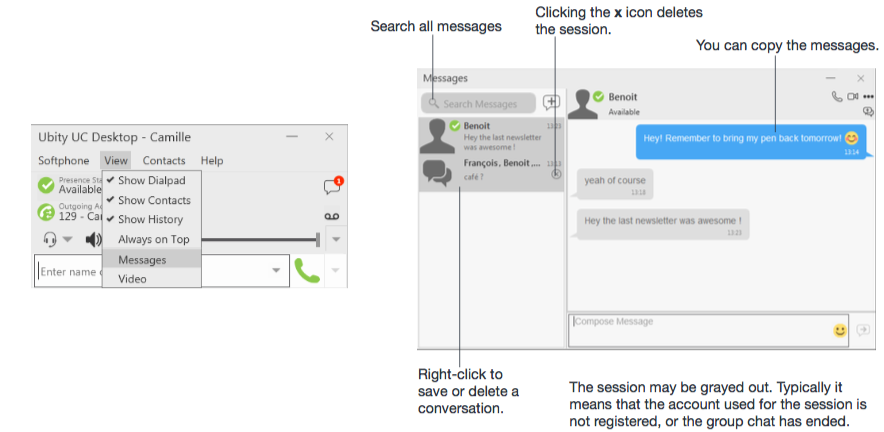
3 Viewing messages
To view your recent IM activity for any contact, group chat session, or chat room session, perform one of these actions:
- Click the Messages window icon:
- Click Shift + Control + M.
- On the menu, click View > Messages.
4 Sending and receiving files
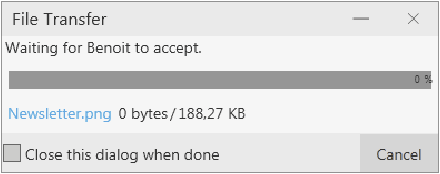
Sending Files
Choose one of these actions:
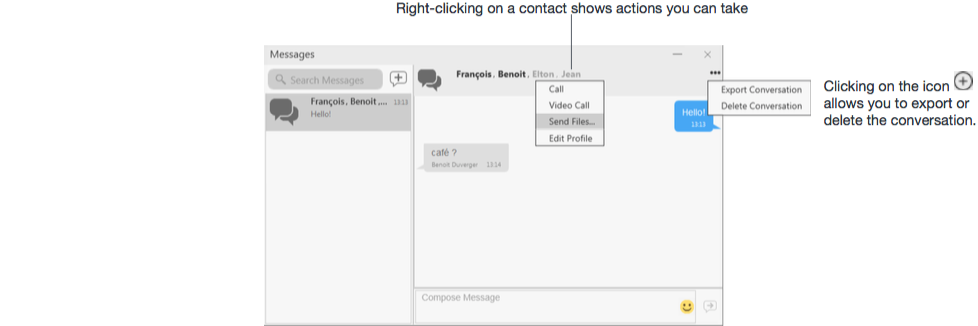
- Right-click a contact and choose Send Files; a standard Open dialog box opens. Select the files to send and click Open.
- Drag a file from a folder to the IM session of the Messages window.
The Send Files dialog appears with a “waiting” message. To cancel the file transfer before the other person retrieves the files, click Cancel.
Receiving Files
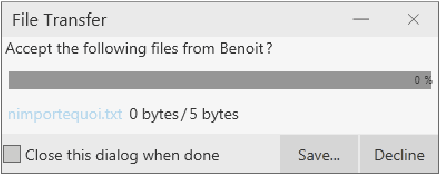
The file is saved to the location specified in Preferences > Files & Webs tabs.

