
1 Initial setup
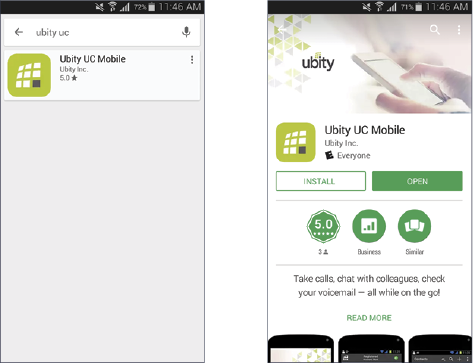
Access the Google Play Store to download the Ubity UC Mobile app.
2 Starting Ubity UC Mobile
We strongly recommend that you perform your initial setup from within a “known” network, such as in your enterprise or within range of your home network (if you have one) and not in a network such as an Internet cafe.
Set up Wi-Fi connection
Go to Android Settings > Wireless & networks and look at the Wi-Fi field:
- If it is on and a message such as “Connected” is displayed, then your phone has a Wi-Fi
connection. Go to the next step. - If it is off and the message “Turn on Wi-Fi” appears, then tap the field to turn on Wi-Fi and
wait for the message “Connected”. - If the message doesn’t appear, tap Wi-Fi settings (the next field). On the Wi-Fi settings screen, tap the desired network and complete the popup that appears. The message “Connected” will appear.
You can connect to as many networks as you want. Whenever you move into range of one of these networks (and assuming you’re not already connected elsewhere), you will automatically connect to that network.

Set up mobile data connection (if applicable)
Go to Android Settings > Wireless & networks, and then tap Mobile networks (the display of these settings may vary depending on the version and model of your Android). Make sure:
- Data enabled is On
- Use only 2G networks is Off (in order to enable 3G).
Let Ubity UC Mobile use mobile data when no Wi-Fi is available
To do so, launch Ubity UC Mobile and go to Settings > Preferences and turn on “Use When Available” and “Allow VoIP Calls”.
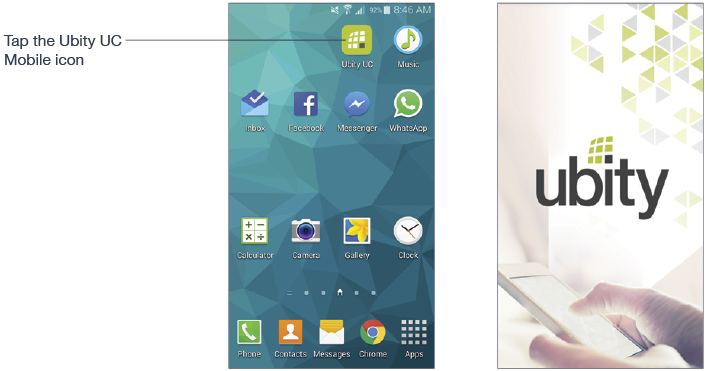
Launch Ubity UC Mobile
Tap the Ubity UC Mobile icon on the phone.
In general, Ubity UC Mobile works in portrait mode. It also supports landscape mode for typing messages so users can take advantage of a larger keyboard.
Android 6.0 Marshmallow Permission
When first running Ubity UC Mobile with Android 6.0, you’ll be prompted to pick and choose which permissions to allow for individual features such as Camera, Contacts, and Microphone and so on. Permissions for Ubity UC Mobile can be managed by going to your device’s Settings > Device > Apps > Ubity UC Mobile.
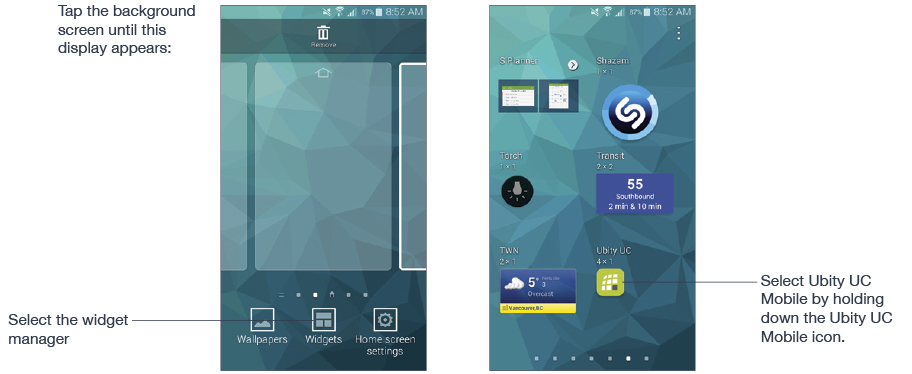
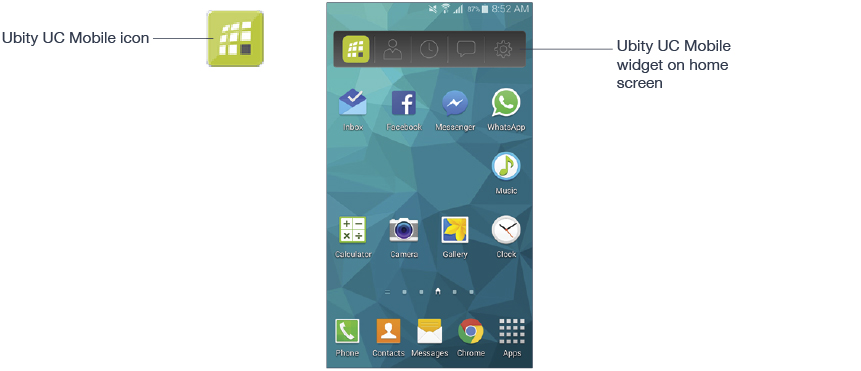
3 Widget
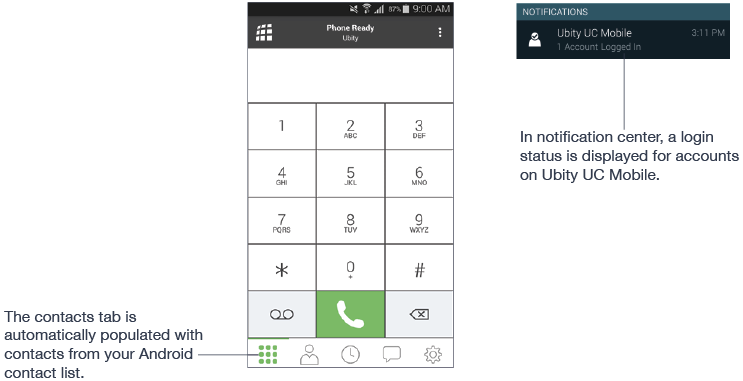
Ubity UC Mobile has a widget that allows you quick access to each tab of Ubity UC Mobile such as: Dial Pad, Contacts, History, Messages and Settings. The widget doesn’t show a badge for unread messages or missed calls.
To add the widget to the home screen, go to the widgets library on your device, look for Ubity UC Mobile, hold down the Ubity UC Mobile icon and drop it on to the Home screen.
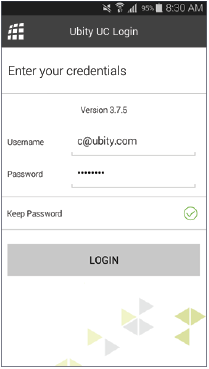
4 Logging in
Once the app is downloaded and installed, and you have started it by tapping the Ubity UC Mobile icon, you will be asked for a username and password. These credentials are the same as the ones you use on Ubity’s web management portal, commonly referred as Studio.
Username: the username used to log into the Ubity management portal
Password: the password used to log into to the Ubity management portal
5 Start and close Ubity UC Mobile
Tap the Ubity UC Mobile icon to start Ubity UC Mobile. After a few seconds, the Ubity UC Mobile screen appears.
1 Display the Phone, Contacts, or History screen or the first Settings screen.
2 Tap the Menu button on the Android phone and choose Exit.
