
Administrator’s Guide to managing the 911 addresses associated with your phone system from Studio, Ubity’s online management portal.
Also, see 085 — Ubity’s 911 Service Terms & Conditions.
1 Operation of the 911 service with your Ubity system
The agent asks the caller the type of emergency service (ambulance, police or fire department) and then asks for confirmation of the postal address. He compares it with that which he has in his database, which is made up of information captured in Studio, the Ubity Web interface (in the 911 Address section).
If the address matches the one in the database, the agent transfers the call to the PSAP (Public Service Answering Point) corresponding to the caller’s area code.
If the address does not match, the agent takes down the new address, runs a search in order to find the PSAP corresponding to the area code and transfers the call.
The PSAP transfer is operator-assisted. In other words, the agent provides the PSAP with the information already collected (address and type of emergency service requested) and ensures that the communication is well-established and of good quality. The caller’s number is communicated to the PSAP should the PSAP need to call back the originator.
If the call is disconnected prior to being transferred to the PSAP, the agent will attempt to call back the number displayed/confirmed.
If he cannot communicate successfully, he will send the call as hung up, together with the address appearing in the PSAP system.
If no address has been entered in the system, the agent will contact Ubity directly to obtain the address we have on file. If we don’t have an address on file, we will provide the default billing address linked to your account.
Note: It is thus very important to keep your 911 address current as this is the information transmitted to the emergency centre should you be unable to provide it to the agent.
2 Adding your 911 Address
Log into the Ubity web interface
Address of the interface: https://studio.ubity.com
Username: your e-mail address
If you have never logged on to the interface or if you forgot your password, make a request on the interface (by clicking on Recover my password) because we cannot access it for security reasons.
Creating a initial 911 address
After logging on to the site, you must go to the My account tab, then Account settings and then click on 911 Addresses.

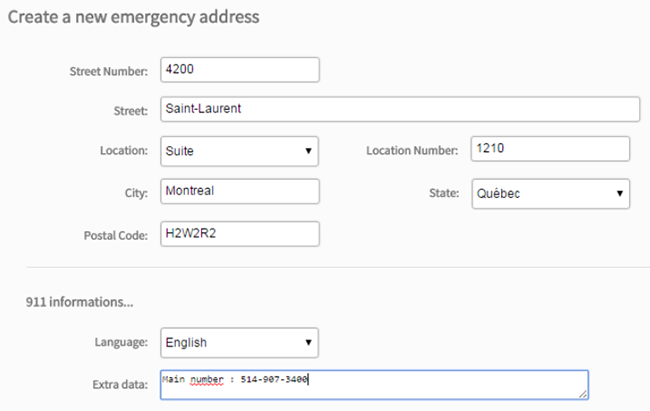
Important note: By default, the displayed number is the one used as callerID for your company. If you do not want this number to be transmited to the PSAP or if you do not have a callerID configured, please add your callback number in the Extra data field.
The address then appears with the list of your telephone extensions underneath, i.e. those which are physically located at the 911 address.
3 Adding other 911 addresses
If your offices are deployed over several sites, you will require an equal number of addresses dedicated to your 911 addresses.
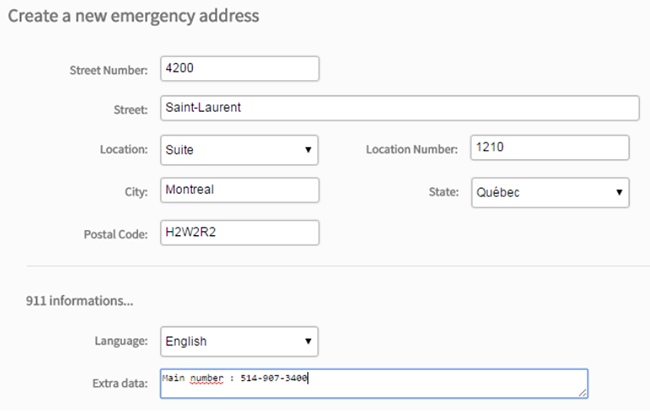
If you need to add other 911 addresses, you must go to the My account tab, then Account settings and on 911 Addresses and then on Add address. The following form is displayed on the screen.
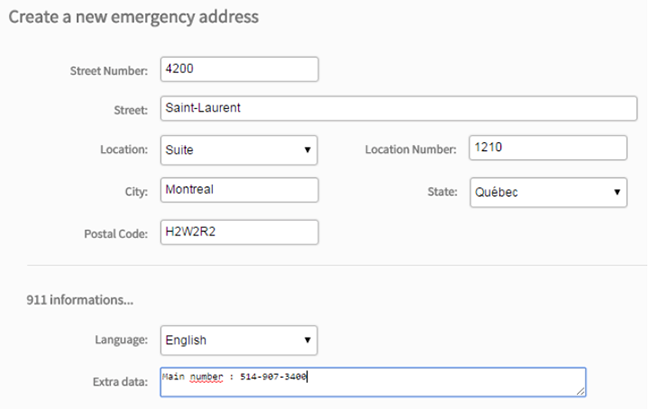
Important note: By default, the displayed number is the one used as callerID for your company. If you do not want this number to be transmited to the PSAP or if you do not have a callerID configured, please add your callback number in the Extra data field.
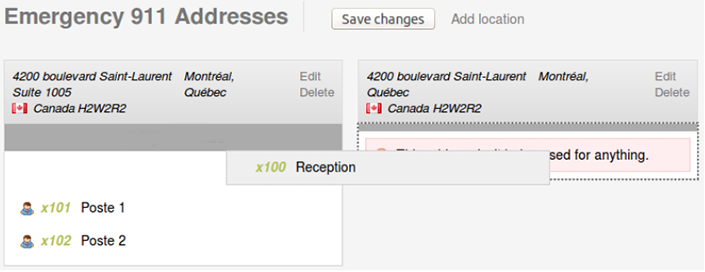
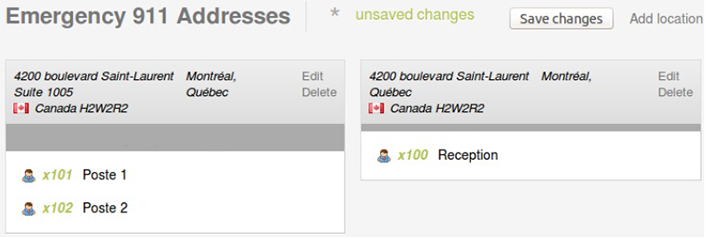
Your new address appears next to those already created. You must then add the extensions physically located at this new address. To do this, you must click on the corresponding extensions and drop them underneath the new address.
4 Changing your 911 addresses
If you are moving, you mustn’t forget to update your 911 address. To do this, you must access the My account tab, then Account settings, then click on 911 Addresses and then on Change next to the address you wish to update. The following form is displayed on the screen.
Important note: By default, the displayed number is the one used as callerID for your company. If you do not want this number to be transmitted to the PSAP or if you do not have a callerID configured, please add your callback number in the Extra data field.
