091 — Guide for activating automated reports
Administrator’s guide to activating automated reports of your phone activities from Studio, Ubity’s online management portal.
1 Log into the Ubity web interface
Interface Address: studio.ubity.com
Username: your e-mail address
To obtain a password, you must request one on the interface (click on Recover your password) because Ubity does not have access to them for security reasons.
2 Overview of the feature
To access this feature, navigate to the Reports tab, and then click on Automated reports.
From here, you can consult existing automated reports. You can view them according to criteria Filter or by their State.
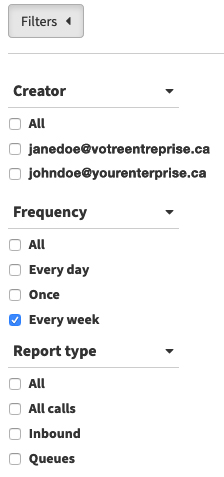
Filters
You can view automated reports according to their Creator, Frequency, or Type.
States
You can view automated reports according to their State.
Actions
You can modify existing automated reports.
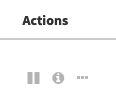
Pause
![]() Click on this icon to temporarily pause the automated delivery of a report.
Click on this icon to temporarily pause the automated delivery of a report.

Information
![]() Click on this icon to get more information about the parameters of an automated report.
Click on this icon to get more information about the parameters of an automated report.

More options
![]() Click on this icon to view more options.
Click on this icon to view more options.

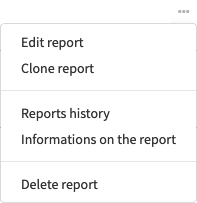
- Edit report: Modify the report parameters
- Clone report: Create a copy of the report (this action is not applicable to completed reports)
- Reports history: View the list of reports sent by date and time of delivery, and download a copy of the CSV file sent
- Information on the report: Get more information about the parameters of an automated report
- Delete report: Cancel the report generation and stop its automated delivery (Warning! This action is final, and this report can no longer be retrieved)
3 Creating an automated report
To create a new report which you want to receive by email automatically, click on Create a report.
A window will then open with three tabs.
General
Under this tab, you must enter the parameters of the type of report to be generated and the frequency of its automated delivery.
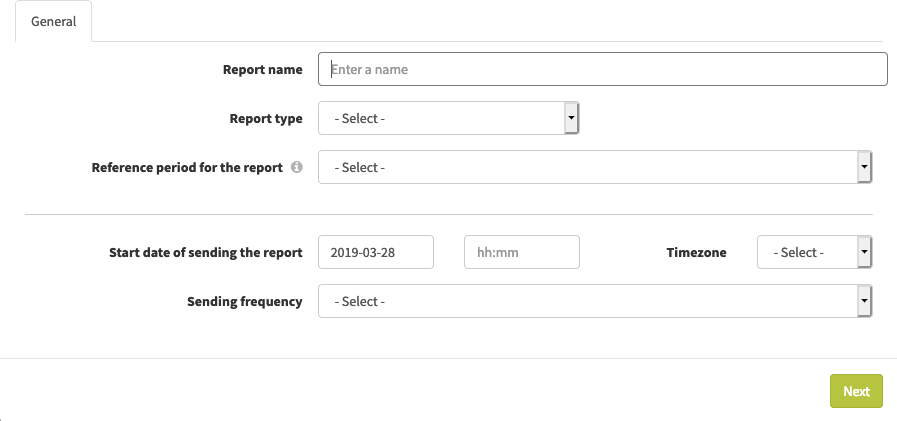
Fields:
- Report name: Give the report a name that will allow you to recognize it (this can be modified later)
- Report type: Select the type of calls that should be reported using the same filters as in the List of calls menu of the Reports
- Reference period for the report: Identify the time period for which you want to obtain call data
- Start date of sending the report: Choose the date of delivery for the first report
- Timezone: Select the time zone according to which you want to receive reports
- Sending frequency: Identify the frequency at which you wish to receive the report (this frequency is based on the sending start date)
Some fields are required to move to the next tab: they will be identified in red if they have not been filled correctly.
Recipients
Under this tab, you must enter the email address(es) of the recipients yu wish to send automated reports to.
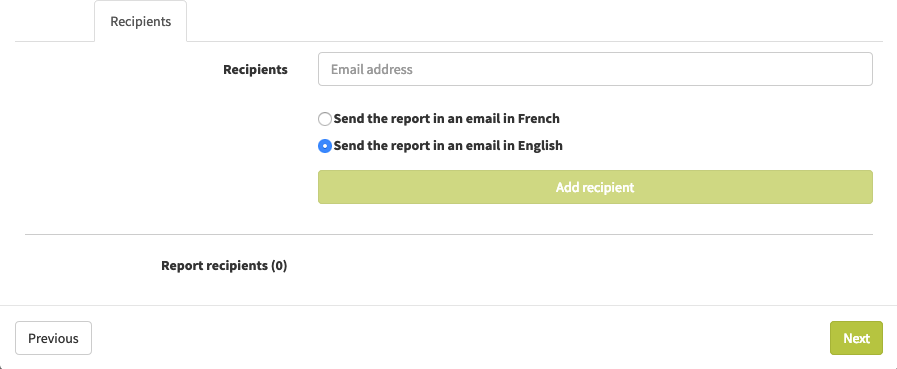
Fields:
- Recipients: Enter one by one the complete email addresses of the recipients to whom the report should be sent
- Language: Specify the preferred language of communication for each of the recipients
- Report recipients: Once you have clicked on Add Recipient, the recipient will be added to the mailing list
Summary
This tab provides a summary of the parameters selected for the new automated report, which you can review.
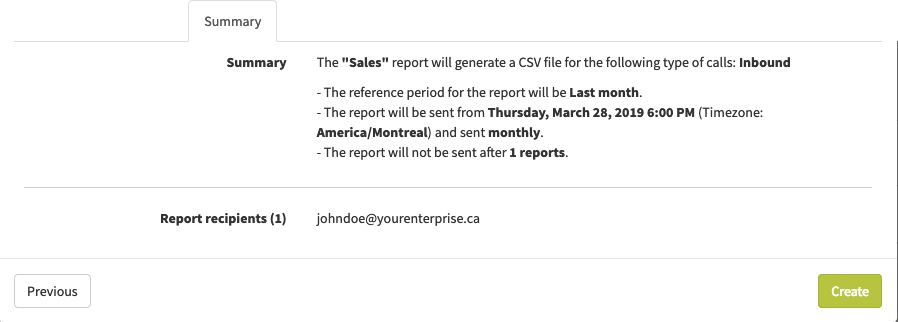
You can edit these parameters by selecting Previous, or go ahead to create and activate the report by selecting Create.

4 Report Email
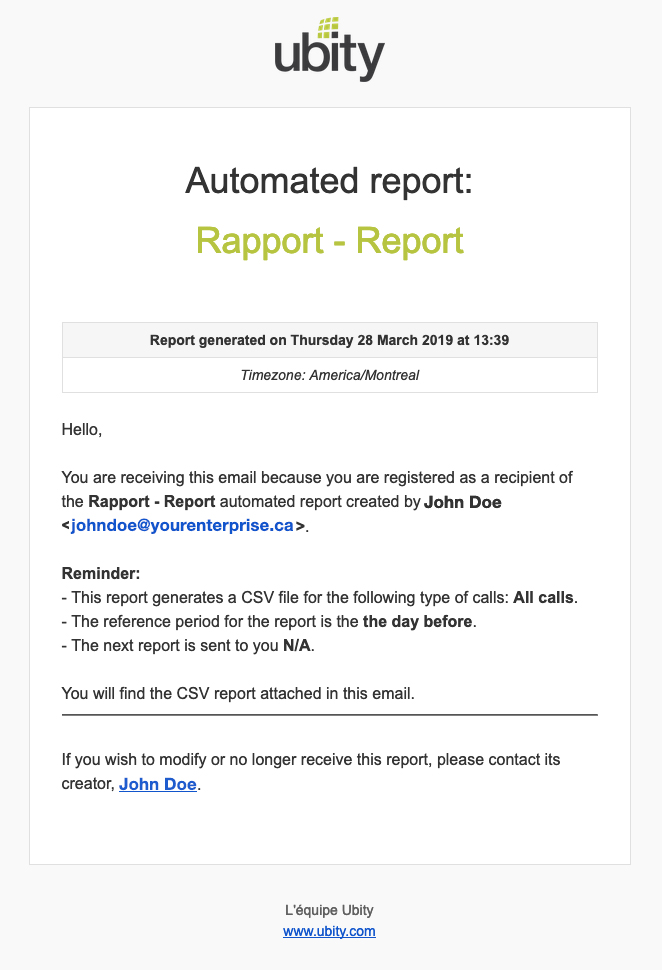
Automated reports are sent by email to the recipients registered when the report was created. This email includes the following information:
- the date and time at which the report was generated
- the name of the report and the user who created itt
- the parameters of the report
- an attached CSV file of the data
5 Deleting an automated report
Navigate to the automated report feature in the Reports tab, and under automated reports.
Find the report you wish to delete by using a Filter or according to its State.
![]() Click on this icon to access the report options.
Click on this icon to access the report options.

Select Delete Report to cancel the report generation and stop its automated delivery.
Warning! This action is final, and this report can no longer be retrieved.