
Administrator’s guide to the Call-Back feature for your contact center.
The Call-Back feature allows a caller on hold in a call queue to choose to be called back by an agent from the contact center instead of staying on the line.
1 Call-Back flow
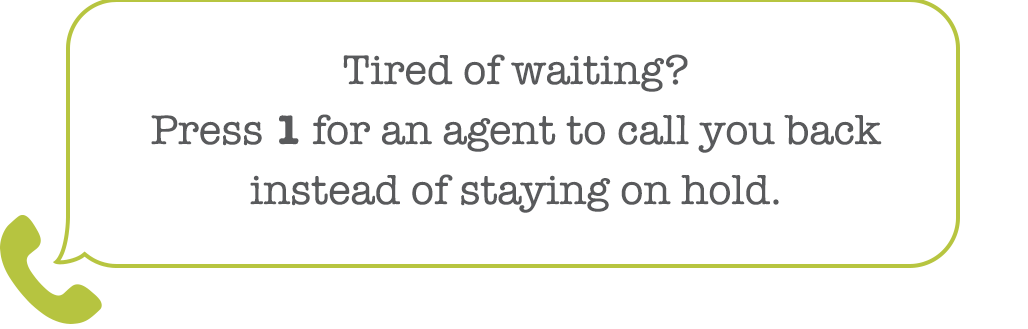
When the number is dialled, the call queue is reached and the caller is put on hold, a message announcing the Call-Back option will play. For more information on how to record this message, see point 2 of this guide.
You can configure the queue to announce the position of the caller in the waiting queue. To do so, connect to Studio, and edit the Caller Options of the queue, under Tools > Contact Center > Call Queues (see point 2 below for more details on how to edit a call queue).
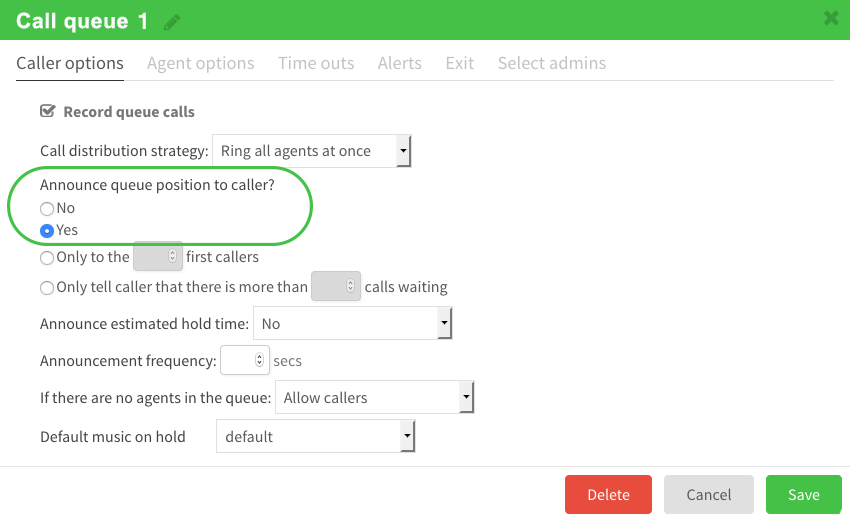
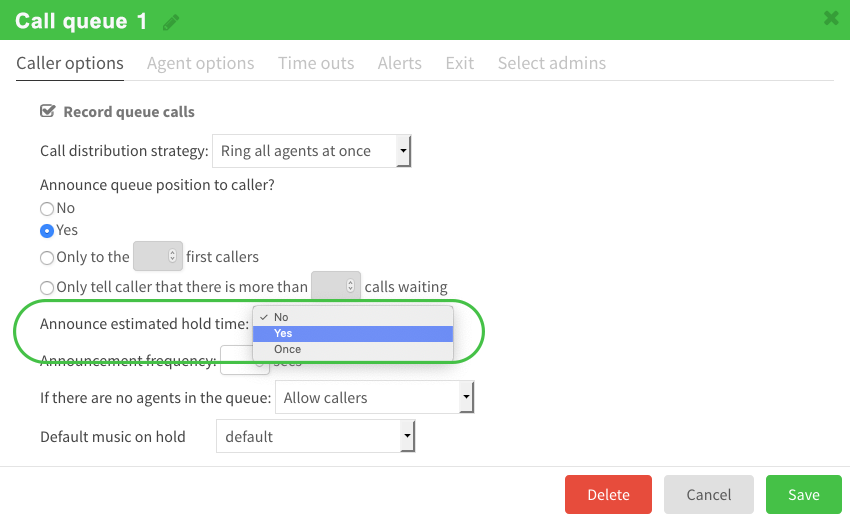
You can also announce the estimated hold time of the waiting queue:
When the Call-Back option is chosen, the position of the caller in the waiting queue is saved. An automatic message will ask the caller at which phone number he wishes to be called back.
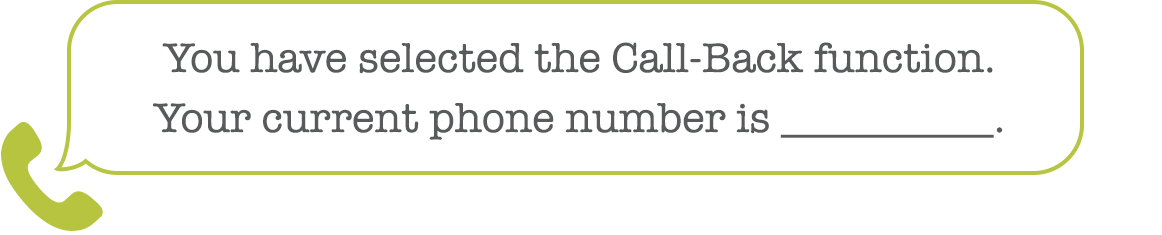
To be called back at the same number
If the caller wishes to be called back at the same number used to place the call, he is invited to press 1.
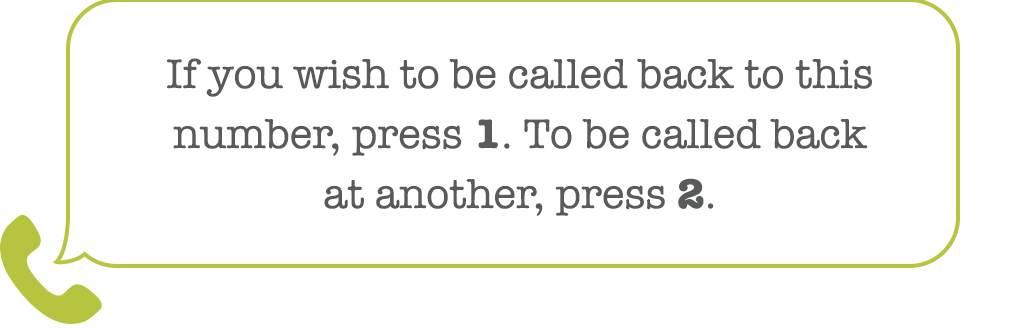
To be called back at another number
To be called back at a different number than the one used to place the call, the caller must press 2.
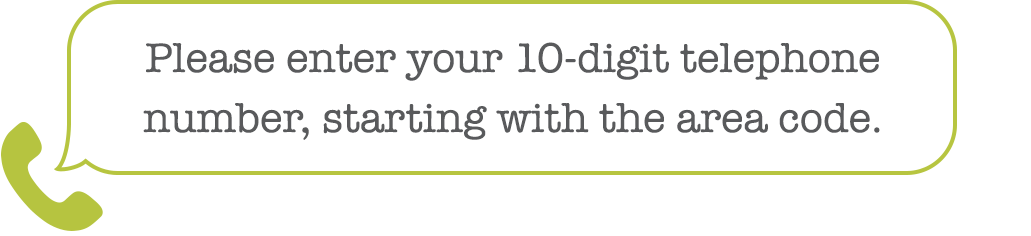
The caller will then be invited to enter the 10-digit phone number at which he wishes to be called back, starting with the area code.
The caller can now hang up, and he will keep his same position in the waiting queue.

Call-Back
When the caller reaches the first position in the waiting queue, the first available agent will receive an audio prompt before being put in contact with the caller.
The agent is now in contact with the caller, and can process his request.
When there is no answer
If the caller is unable to answer the call-back from the agent, normal queue rules apply. By default, the agent can leave a voicemail or hang up. The caller’s position in the waiting queue is now lost.
2 Activating the Call-Back feature
Recording the announcement message
For an automated message to announce the Call-Back option in a call queue, you must first record it, identifying which key leads to this option. For example, this recording might say « Tired of waiting? Press 3 for an agent to call you back instead of staying on hold. »
Then, send this recording to our customer service at [email protected] for one of our agents to configure this announcement message in the call queue.
Connect to the interface
Interface Address: studio.ubity.com
Username: your e-mail address
If you have never signed in to the interface or if you have forgotten your password please request one on the interface main page (by clicking on Recover Your Password) as we do not keep these on file for security reasons.
Edit the Call Queue
Navigate to your call queues under the Tools menu, in Contact Center > Call Queues.
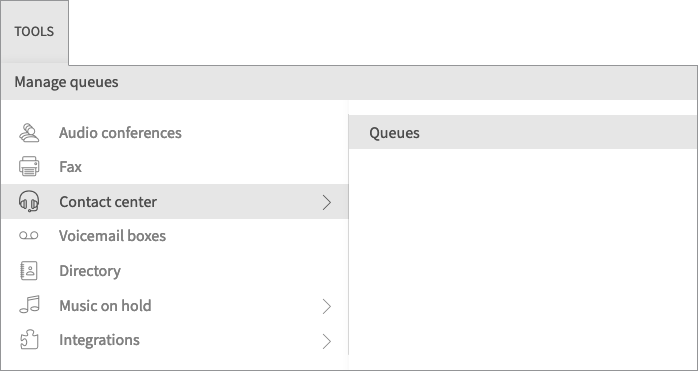
Find the call queue for which you want to activate the Call-Back feature, and click the  icon to edit it.

Activate the Call-Back feature
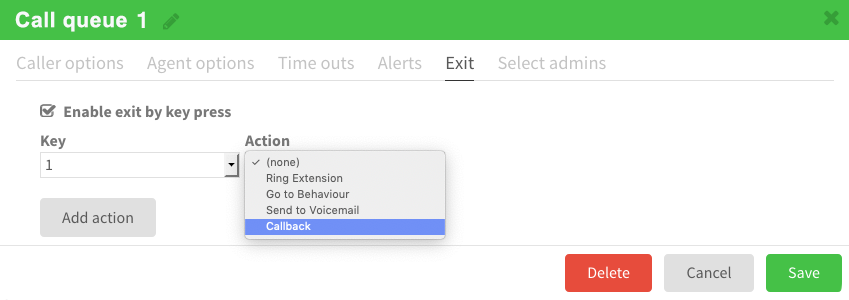
Under the Exit tab, check the Enable exit by key press box to activate the Call-Back feature for the call queue.
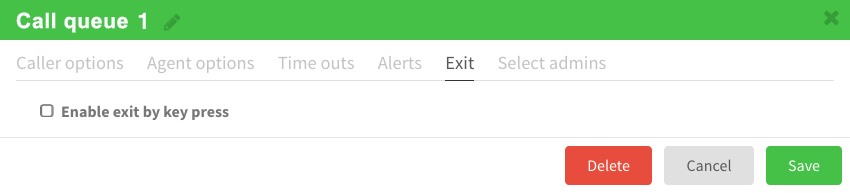
Select the key you identified in your announcement message as the Call-Back command, and assign it the Callback action.
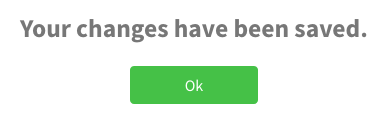
Save your changes
For the configuration to be saved, do not forget to click the Save button.

A message will confirm your configuration has been saved.
3 Deactivating the Call-Back feature
Connect to the interface
Interface Address: studio.ubity.com
Username: your e-mail address
If you have never signed in to the interface or if you have forgotten your password please request one on the interface main page (by clicking on Recover Your Password) as we do not keep these on file for security reasons.
Edit the Call Queue
Navigate to your call queues under the Tools menu, in Contact Center > Call Queues.
Find the call queue for which you want to deactivate the Call-Back option, and click the icon to edit it.
Deactivate the Call-Back feature
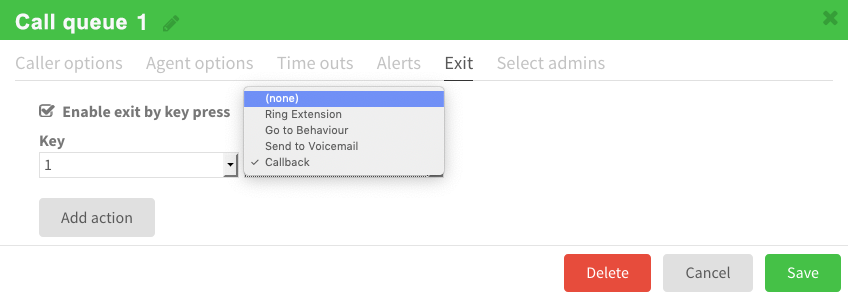
Deactivate the Call-Back feature by navigating to the Exit tab and selecting (none) as the action assigned to the 1 Key.
Save your changes
For the configuration to be saved, do not forget to click the Save button.
A message will confirm your configuration has been saved.
