1 Contacts
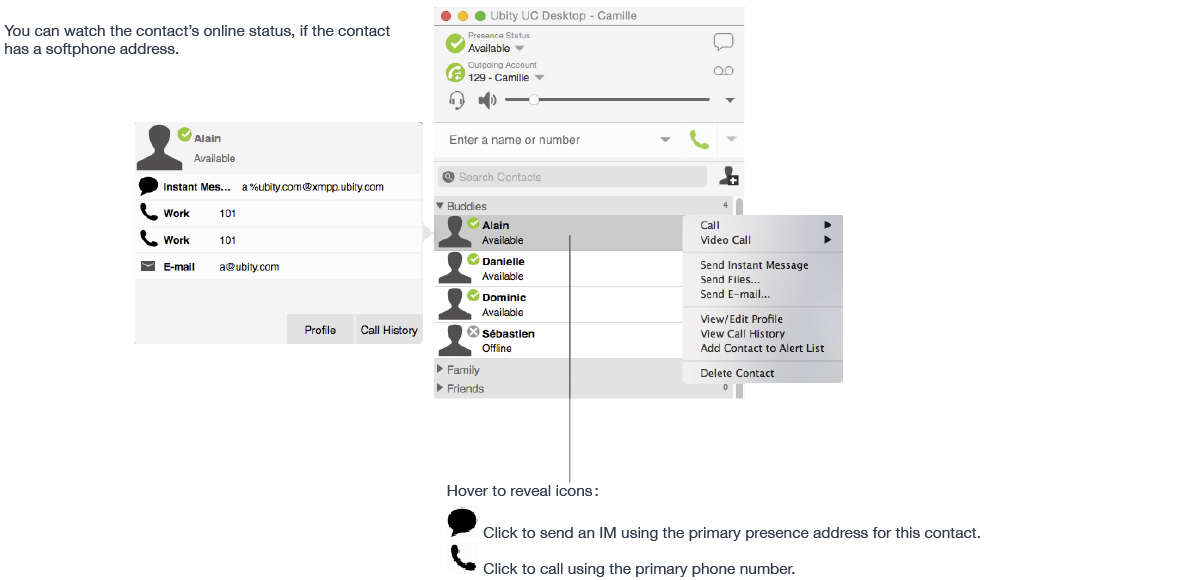
The Contacts tab displays your contacts. Each contact is shown with presence information and icons for single- click phoning and IMing.
If the Contacts tab is not showing, go to the menu bar and choose View > Show Contacts.
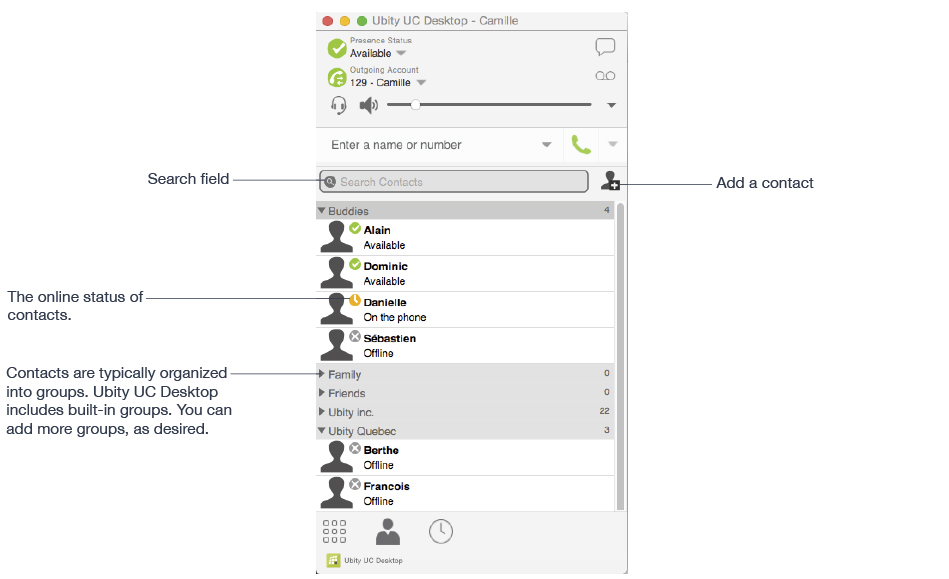
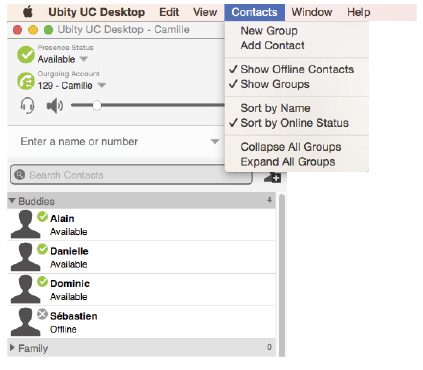
You can change the detail and layout of the contact list from the menu bar choose Contacts and set the desired options.
2 Adding a contact
Adding a Contact Using an Existing Address
You can add a contact by capturing existing information:
- If you are on a phone call with a person who is not a contact, click the Add to Contacts icon in the Call panel.
- On the History tab, select an entry that is not a contact. Control-click and choose Add Contact. The Contact Profile dialog appears. Complete the dialog as desired and press OK.
If the contact method is Softphone or Instant Message, an online status request is sent to this person.
Manually Adding a Contact
Click ![]() , or control-click a group and choose Add Contact to Group. The Contact dialog appears.
, or control-click a group and choose Add Contact to Group. The Contact dialog appears.
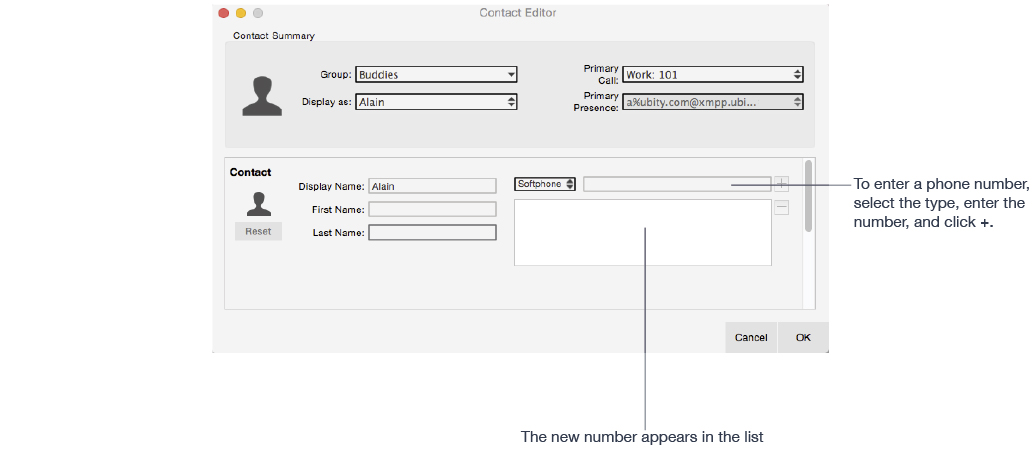
Contact Summary
| Field | Description |
|---|---|
Group |
Click to show the list of groups. Check each group this contact should belong to. |
Primary call |
If the contact has more than one number, select the primary number. This number will be used with single-click calling. |
Primary presence |
If the contact has more than one number, select the primary number. This number will be used with single-click calling and double-click calling. |
Other Sections
| Field | Description |
|---|---|
Display name (required) |
The display name for this source of information. |
First name, Last name |
This field appears only the contact has more than one Softphone number or Instant Message address. The primary presence is used as follows:
You can still send IMs to this person at their other addresses, but you must right-click and choose from the context menu. |
Display Name (required) |
The display name for this source of information. For example, the display name from the XMPP contact list. |
First Name, Last Name |
Optional |
Updating Contacts from the Directory
If you have created a contact created from directory, you can control-click the contact and choose Update from Directory in order to bring the latest directory information (if any) into the contact. Any key data you had added or changed in the contact may be overwritten by the update. Non-key data (such as the display name) will not be removed.
Changing Contact Information
To change the information for a contact, Ctrl-click the contact and choose Edit Profile.
Merging and Splitting Contacts
You can drag one or more contacts to a contact. The dialog appears confirming that you want to merge contacts.
Deleting a Contact
To delete one or more contacts, select them, Ctrl-click, and choose Delete or Delete Selected Items. The contacts are removed from this group. If a contact belongs to several groups, it is removed from all groups.
3 Managing Groups
Adding, Deleting or Renaming Groups
Select any group, Ctrl-click, and choose the appropriate menu item.
4 Using Contacts
In the Contacts tab, you can:
- Double-click a contact to phone or IM (depending on how double-clicking is configured in Preferences > General);
- Click a contact to view the flyout;
- Control-click to show the menu, or
- Hover over a contact to revel icons for single-click phoning or IMing.
5 Sharing Online Status
Setting your Online Status
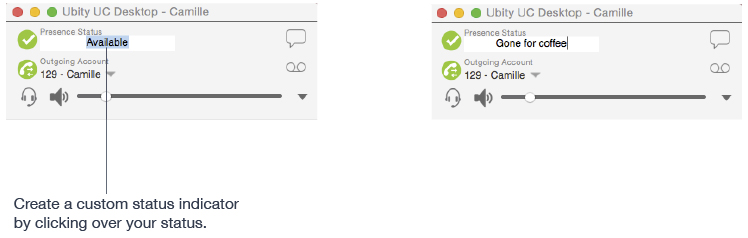
Changing your Status
Click the down arrow beside the online status indicator on Ubity UC Desktop, and select the desired value.

Setting up Status Indicators
You can create a custom status indicator : click the down arrow beside the status indicator, and double-click on one of the existing indicators ; type your custom status.
Status Indicators
| Indicator | Meaning for your Status | Meaning for Others’ Status |
|---|---|---|
|
Either:
When you have this status, Ubity UC Desktop will automatically detect when you are Idle or On the phone, and change the status to match. |
You can contact this person. |
|
You have set your status to this value. Ubity UC Desktop will never automatically switch you out of this status; you must switch yourself. | You can contact this person. |
|
You have set your status to this value. Ubity UC Desktop will never automatically switch you out of this status; you must switch yourself. | You can contact this person. |
|
Either:
|
You can contact this person. |
|
You have set your status to this value. Ubity UC Desktop will never automatically switch you out of this status; you must switch yourself. | You cannot contact this person. |
|
You have set your status to this value. Ubity UC Desktop will never automatically switch you out of this status; you must switch yourself. | You cannot contact this person. |
|
You have not moved or clicked the mouse or pressed a keyboard key for the Idle period. As soon as you click the mouse or keyboard, your status changes to “Available”. |
You can contact this person. |
|
You have set your status to this value. The other person sees you as offline, even though you are actually online. The other person cannot tell the difference between this status and you really being offline. | The contact is either not logged on or does not want to share online status. |
No icon |
Not applicable | You are not seeing the other person’s status. |
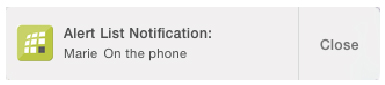
6 Adding Contacts to the Alert List (Buddy Pounce)
You can add a contact to the Alert List in order to request to be notified when the online status of a contact changes.
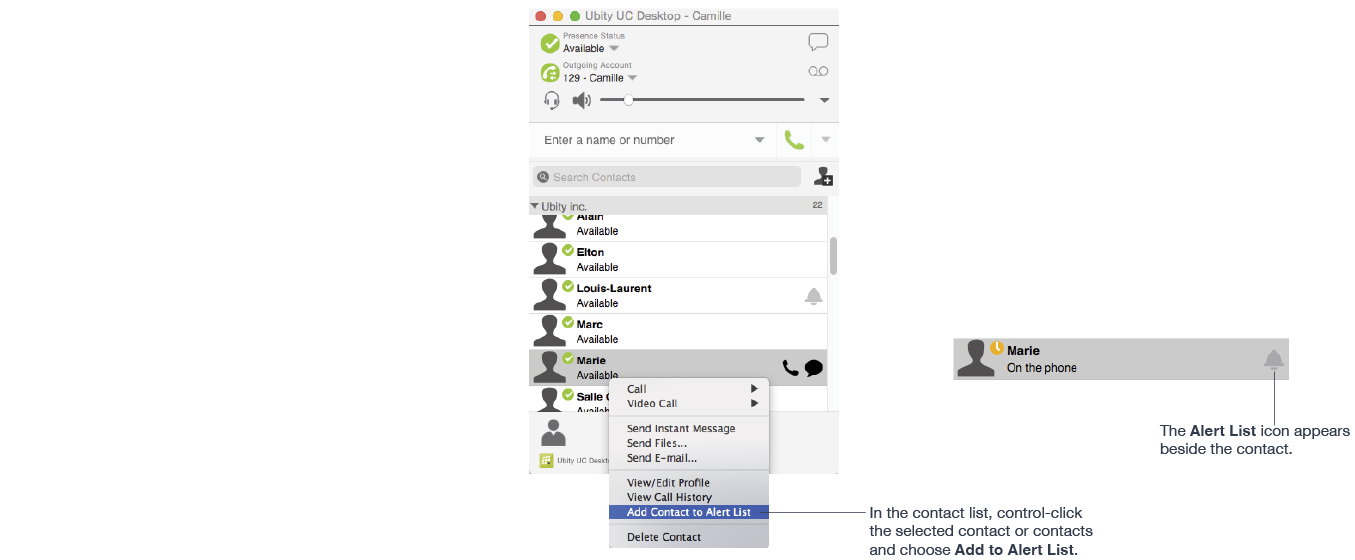
When the contact’s status changes, an alert appears: