Administrator’s guide to the conference tool included in your phone system from Studio, Ubity’s online management portal.
1 Log into the Ubity web interface
Username: your e-mail address
To obtain a password, you must request one on the interface (click on Recover your password) because Ubity does not have access to them for security reasons.
2 Create a conference
To create a conference, go to Tools, and click on Audio Conferences.
On the Active conferences tab, click the Create conference button.

A dialog box will open:
Step 1 – Select the Conference Type
Choose the type of conference you want to create by clicking on it. Two choices are available:
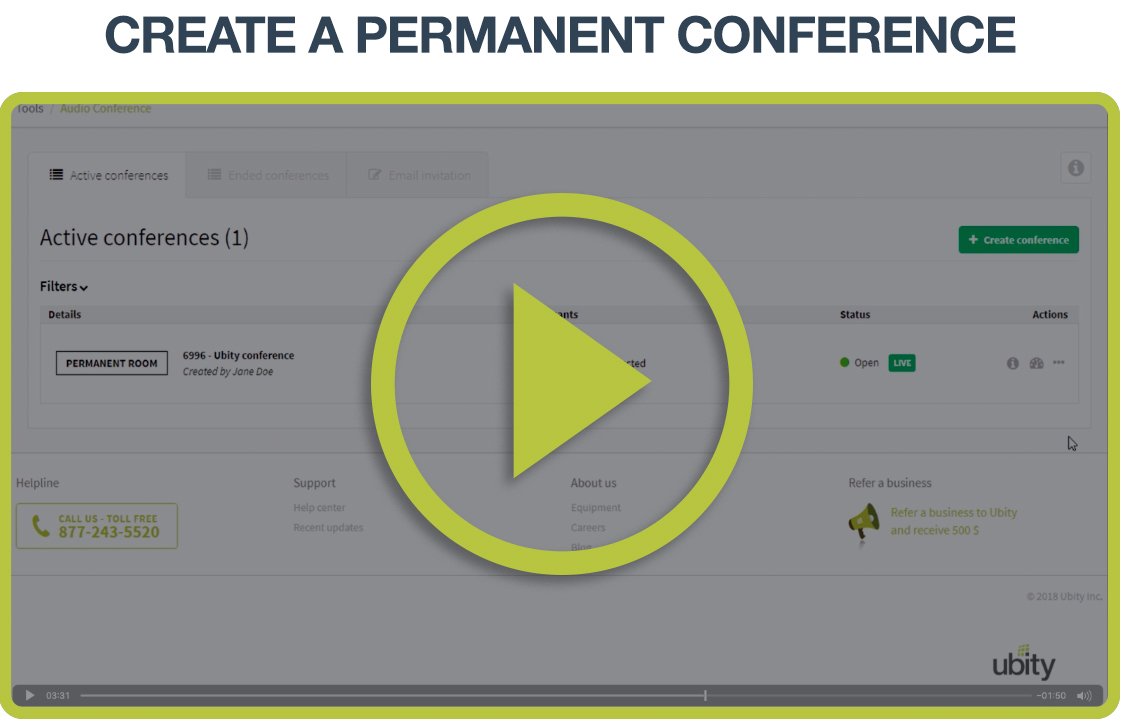
- Permanent: Use this option if you want to create a conference room that can be reused by your teams
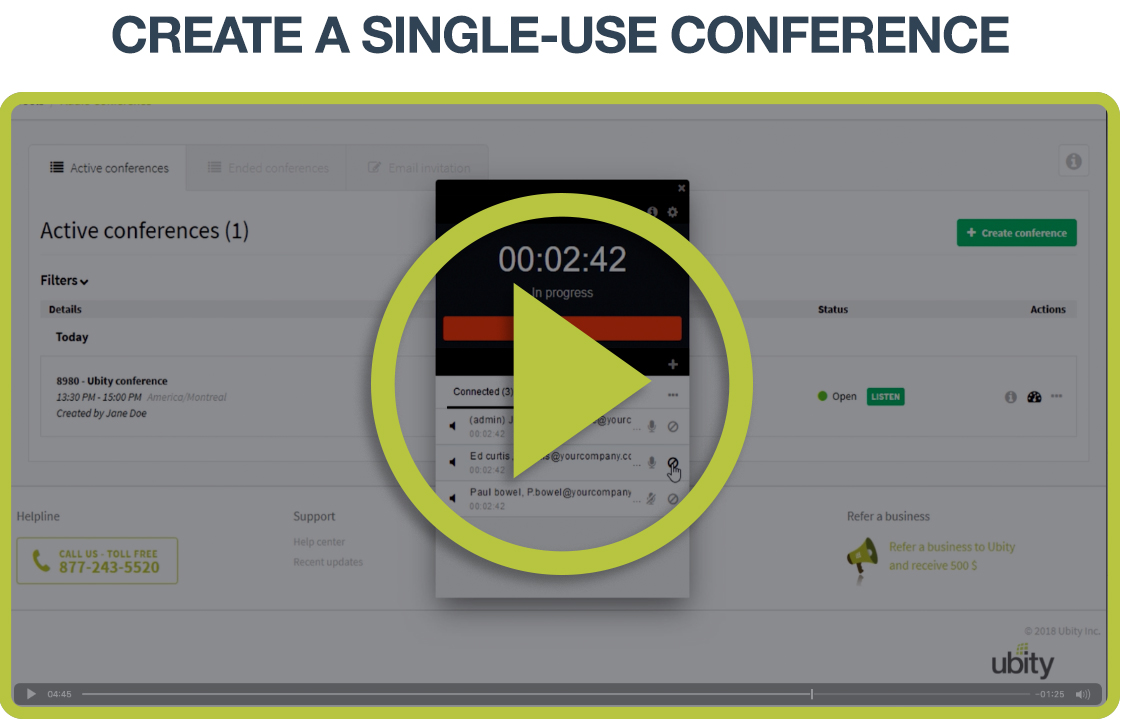
- Single-use: Use this option to create a conference room that can be used only once (for example, for a meeting with participants outside your organization)
Step 2 – General information
In the Title field, type the name you want to give to the conference (for example, « Sales Meeting »). This name will appear in the invitation email sent to the participants.

For a Single-use conference, choose a start date, the estimated duration, and the timezone. (Please note that the call cannot exceed 3 hours: create a new one if necessary.)

Select the default language (English or French) to greet participants in the conference room using the drop-down menu.

Check the options to activate:
Add me to the conference
Check this box if you want to be listed as a participant.
Enable call recording – Recommended
Check this box if you want an audio recording after the call is finished.
Send an email report to the administrator – Recommended
Check this box if you want to receive a report by e-mail once the call is finished.
Announce joining and leaving participants – Recommended
Check this box if you want a voice to announce the names of participants joining and leaving.
Enable web streaming – Recommended
Check this box if you want to invite a large number of external participants (for example, as part of a webinar). Warning: anyone with the URL link to the call will be able to listen to it. For security reasons, this option is disabled for single-use conferences.
Click the Next button to go to the next step.

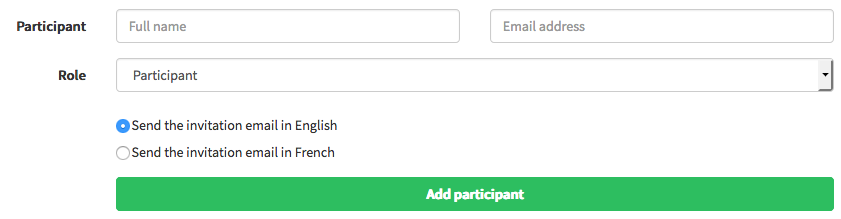
Step 3 – Add Participants
To add a participant, enter the name and email address of the participant and select the role you want to give to the invited participant. Two roles are possible:
- « Administrator » role: Choose this option to give the invited participant the role of administrator (an administrator can start, moderate or terminate a conference).
- « Participant » role: Choose this option to give the invited participant the role of a simple participant.
Click on the Add participant button. Repeat the same steps for each participant you wish to invite.
Click on the Next button to get a summary of the conference you are about to create.
Review all the informations then click on the Create conference button to confirm the creation.
An invitation email containing instructions to join the call will be automatically sent to all participants.
If you want to invite participants using your own invitation emails:/b>
- Create a conference by adding an administrator, but without inviting other attendees. Then click the « i » icon (Conference Information) associated with the created conference. In the dialog box that opens, click on « Generic informations » and on the “Copy to clipboard” button. You will then be able to share the instructions with your participants on how to join the call. Note, however, that this method uses generic access codes that won’t allow you know all the information of the participants connected. The use of the widget and the report could therefore be altered.
For your information:
- Participants joining a conference without an administrator will automatically be placed in a waiting room. The conference will begin once an administrator connects to the conference.
- If the only administrator hangs up or is disconnected, the conference will be interrupted and participants will automatically be placed in a waiting room with music. It will resume once the administrator reconnects to the call.
- Please note that for security purposes, a conference call can not exceed 3 hours. Create a new one if necessary.
- Call recordings are usually deleted from your account 7 days after the conference ends. Contact our support team if you want to keep call recordings longer.
3 Add a participant to a conference from the widget
To add a participant from the widget, click the « … » icon associated with the conference and then click on Add a participant.
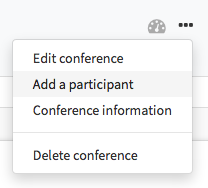
A widget associated with the conference opens.
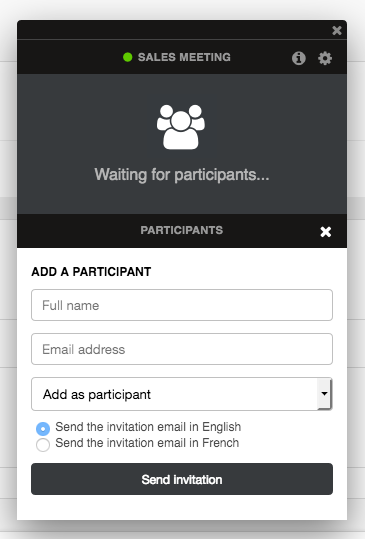
Enter the name and email address of the participant and select the role you want to give to the invited participant. Two roles are possible:
- « Add as administrator »: Choose this option to give the invited participant the role of administrator (an administrator can start, moderate or terminate a conference).
- « Add as participant »: Choose this option to give the invited participant the role of the participant.
Click the « Send invitation »: an invitation email containing instructions on how to join will be automatically sent to the participant.
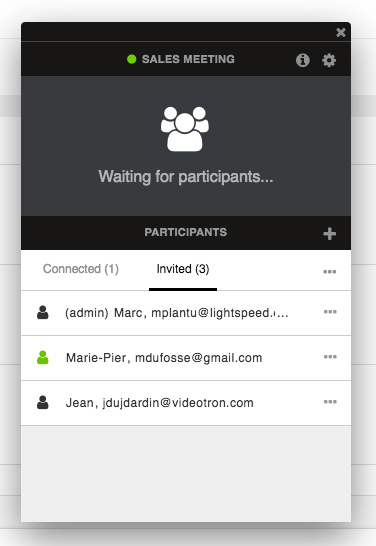
You will be able to find the list of participants invited by clicking on the « Invited » tab. A green icon shown to the left of the participant’s name will indicate that the participant is currently logged in, while a black icon will indicate that the participant is not logged in.
For your information:
- You can resend an invitation email containing instructions to join the conference to the invited participants. Simply click the « … » icon to the right of the participant’s name and then click « Resend invitation email ».
4 Join a conference
To join a Ubity conference room, simply follow the instructions received by email:
- Step 1. Dial the local or toll-free phone number.
- Step 2. Enter the 4-digit conference room number followed by #.
- Step 3. Enter the 4-digit access code (if applicable).
![]() You can also click this information icon associated with the conference. A dialog box containing the instructions on how to join will open.
You can also click this information icon associated with the conference. A dialog box containing the instructions on how to join will open.
For your information:
- Please note that a Single-use conference room can only be reached by participants 10 minutes before its start date.
5 Controlling a conference from the widget
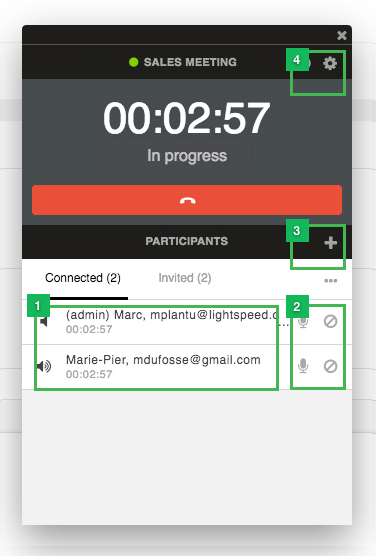
Ubity lets you control your audio conferences with a control widget. Click on the dashboard icon associated with the conference you want to control to open the control widget.
The control widget has 4 main functions. It allows you to:
1. View the participants connected to the conference
2. Moderate the conference by muting or removing a participant
3. Add one or more participants to the conference
4. Enable / disable conference options
6 Retrieve your conference history
Conference History allows you to retrieve the details of your ended conferences and download a call recording and a PDF report associated with each one (if applicable).
To retrieve your conference history, simply click the Ended conferences tab.

To retrieve the session history for a permanent conference, simply click on the name of the permanent conference in the filters: all of the sessions associated with it will be displayed.
For your information:
- Your call recordings are stored for a maximum period of 7 days. Contact us to extend this duration (paid option).
- A conference with no connected participants will not appear in the history.